The Creative Soul Sisters
The Creative Soul Sisters

css1
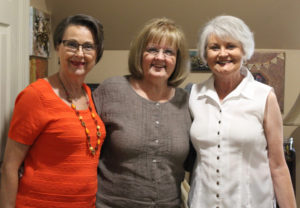
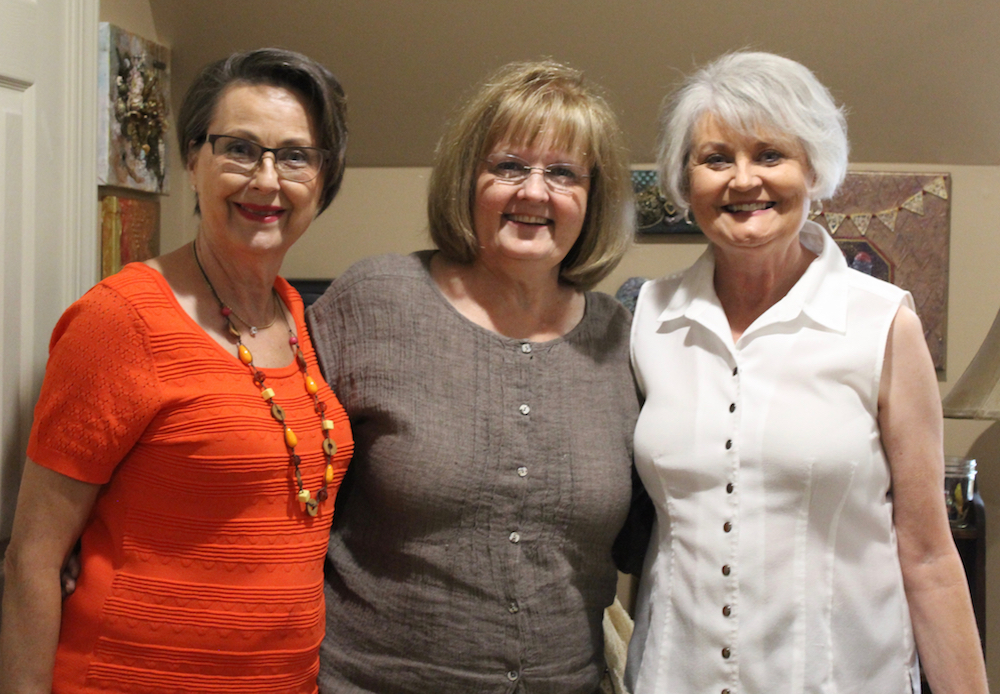
Liz, Vicky, & Christine – the Creative Soul Sisters

We call ourselves the Creative Soul Sisters. We love creating art. We love each other’s company. And we all just happen to love working with Mixed Media.

For years I longed to be part of such a Mixed Media group that regularly met for “art time” – each creating their art projects in a shared environment. I hoped such a group would provide support outside of those group meetings as well, you know – to share a current project or, even better, to discuss technique or ask a question.

I had given up hope of finding such a group to meet with personally – especially in Oklahoma where opportunities to learn Mixed Media techniques (or in my case Assemblage Art – a close cousin of Mixed Media) didn’t seem all that plentiful or, even available. Fortunately, the internet offers numerous such support groups online (I’ll be sharing a few of my favorites at a later time) as well as hundreds if not thousands of tutorials. So, I did find tremendous support online. But I still wished for that personal touch.
css2
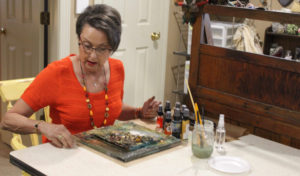
At last month’s meeting, Liz creates at one of three work stations in my art room.

And then it just happened. Circumstances brought the three of us – Christine, Liz, and yours truly together and, you know, we were already friends of sorts. Liz and I graduated from high school together and years later reconnected. Christine is Liz’s sister. It was a slow discovery as I, for one, was very private about my Mixed Media/Assemblage Art – rarely sharing it with another. But when we finally realized that there were three of us all interested in a common medium – Mixed Media – it was inevitable that we would soon become the Creative Soul Sisters.
css3
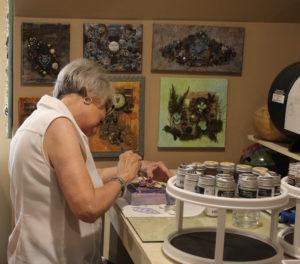
Christine painting at another work station – the one usually reserved for my gourd art work.

We meet once a month and work on our latest projects or teach one another techniques and, of course, take time for visiting and eating. All of us have our areas of strength and each of us works with Mixed Media in a slightly different manner. Liz refers to her work as Mixed Media Collage and she sells her work on Etsy. Christine has a background in scrapbooking and art journaling (Liz and I do not) so she tends to know techniques Liz and I have missed along the way and often is our instructor. Her work is the most versatile of the three of us. And I concentrate on Assemblage Art. But all of us know that Mixed Media is our foundation. And we take great joy in sharing our knowledge and creating together. At times we may even work on the same type of project in an attempt to learn a new technique but the three outcomes will differ greatly.

I guess one of the coolest aspects of our little group is our ongoing discussion via group text for those days in-between our meetings. We share pictures of our finished work or even the first stages of our projects. Or we may even share our latest haul of Mixed Media goodies from a unique source or a sale at one of our local hobby stores. But the brainstorming is the best as we talk together about our ongoing projects and give words of advice or encouragement when another requests it. Our texts are full of snapshots and I must admit, I love finishing up a work and running to take a picture to immediately share with the others.
css4
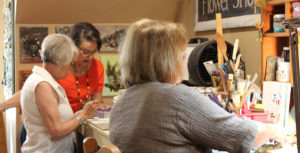
A typical scene at one of our group meetings. I’m working at the primary work station in my art room – one reserved for Assemblage work.

I worked with Mixed Media/Assemblage Art for at least six years before Christine, Liz, and I formed our little art support group. Throughout those years I needed advice, instruction, and encouragement and found it online – mostly. Advice – most definitely. Instruction – I still rely on the internet to provide the latest in instruction. It’s an excellent source for just about anything that has to do with art. But encouragement? That’s lacking online. Even if you are courageous enough to share a picture of your work online with fellow Mixed Media artists, encouragement is most definitely not a guarantee. That’s where a local group can feel like the very best of icings on the cake. Creating together and sharing your art work is so completely fulfilling and encouraging one another while you all learn together is priceless.

So, if you can identify with me in hoping for a local art group, be brave and open up – share with your friends just what you create. Inquire about classes at your local art or hobby stores where you may, in turn, meet artists just like you looking for art friends. And when you find those online support groups that feel like a good fit for you, think about stepping up and asking, “Anyone know of events in my area?”


Vicky
Wait – Mixed Media…That’s Not Exactly Right

Wait – Mixed Media…That’s Not Exactly Right

Ten years ago, when I started teaching myself what I now refer to as my Assemblage Art work, I often consulted Mixed Media magazines, Mixed Media blog posts, and Mixed Media YouTube videos for instruction. You see – in those early days, it was all about learning how to work with so many varying mediums. What was even available? Why couldn’t I make my paint look this way? Or why was that color so vibrant when mine wasn’t? How did I finish it all off? What about that crackling – I couldn’t figure that out. Or that light sprayed effect – where in the world did that come from? How did one get things to adhere that well? And why couldn’t I obtain that rusty look on metal? I didn’t realize that there were at least twenty different ways to paint an item depending on the end result you desired. Or that those sprays were much more than adding a bit of paint to water in an 88 cent Hobby Lobby spray bottle. And much, much, much more.

creatingtreeofhearts
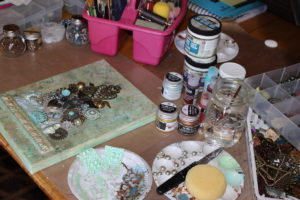
Creating Tree of Hearts while vacationing in the mountains. Notice all the Mixed Media supplies and tools. But then there are all those little pieces – the driving force behind my creations.

And learning Mixed Media techniques was the answer to all that. To become proficient in Mixed Media, one usually needs to learn how to effectively utilize a number of art mediums and the more, the better. And it is also discovering just how much there is to learn all while realizing there is still so much more to learn although you have already spent days, weeks, and months carefully following tutorials from YouTube or art supply sites and then practicing, practicing and practicing it all some more. Yes, what we now know as Mixed Media is the answer. Mixed Media is usually the term I use when searching the internet for a new process or product. And it delivers. But… Mixed Media does not describe the art I now turn out.

When I launched Art Creations by Vicky, I knew I had to properly describe just what my art was. And although I knew it encompassed a great deal of Assemblage technique, I still recalled all those years I spent learning Mixed Media techniques and felt I had to give homage to Mixed Media when naming the type of artwork found on the site. So, I started with “Mixed Media Assemblage Art”. As those two months of starting a site, an Etsy shop, and a Facebook page flew by, I didn’t think much more about my description other than it nagged at me – I knew it missed the mark. Now that I have the time to look around and find other work similar to mine, I have come to the conclusion that I need to remove the “Mixed Media” from the description. And I need to emphasize Assemblage Art.

Here’s a definition of Assemblage Art per Wikipedia:

hearttree5watermark
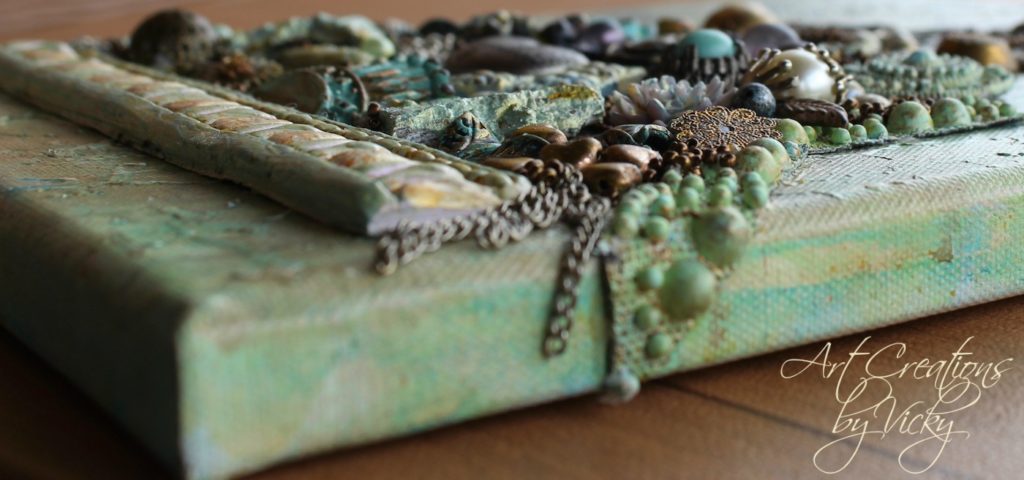
A sideways view of the completed Tree of Hearts


Assemblage Art – an artistic form or medium usually created on a defined substrate (insert canvas here) that consists of three-dimensional elements projecting out of or from the substrate (canvas). It is similar to collage, a two-dimensional medium.


That’s it! That’s me! Finally, an accurate description of just what I create.

So, I’m removing Mixed Media from my art descriptions. It’s pure Assemblage Art. Mixed Media helped me arrive at this place but my love all along has been taking many small objects and forming a single art work with lots of three-dimensional action.

Other descriptive phrases that I feel work well for the type of art I create (other than Gourd Art) are Found Object Art, 3D Art, and even Repurposed Art or Recycled Art.

So, although all this doesn’t mean you will note a difference in what you see here at Art Creations by Vicky, I feel solid in selling myself purely as an Assemblage Artist. Thanks Mixed Media – you are part of what I create but the end product in my case is Assemblage Art. That feels ever so right.

Vicky

SaveSave

My Latest Mixed Media Assemblage – a Sneak Peek!

My Latest Mixed Media Assemblage – a Sneak Peek!

sneakpeekBy necessity, I have taken the last two weeks off. And it was just as I was ready to place the finishing touches on my latest work – a “two canvases make one” sort of Mixed Media Assemblage project. I am really excited as this one has felt good every step of the way even though it represents many hours of work.

sneakpeek1I’m still adding a few embellishments to balance it all out. But the background will be the larger task as I plan to tone it down, remove the drips I purposefully included (and now feel must be removed) and cover up the deep red. I want the central design to be the focus without the background battling for attention.

So, time for a sneak peek! I hope to have the final product by Friday.

Vicky 

New Gourd Project Underway

New Gourd Project Underway

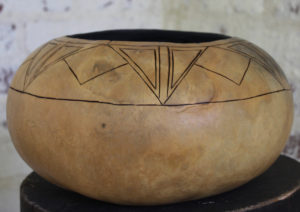
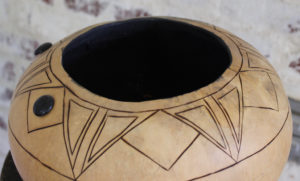
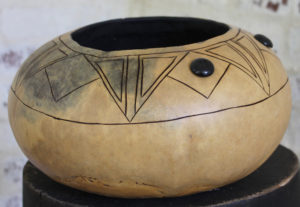
There is a new gourd project at my gourd work station and I’m excited to be creating gourd art once again after concentrating on Mixed Media Assemblage the past few months. In an effort to simplify my gourd designs, I’ve decided this time to concentrate on a rim design and the eventual color. Even with my goal of simplifying, I’m facing challenges. But it’s all part of the learning process, right?!

newgourd1


My favorite gourd shape is the canteen gourd. My woodburning technique has improved greatly and the wavering lines in the design are due more to the bumps in the gourd shape than an uncertain hand. Not that my woodburning is perfect – only improved.


newgourd2


I plan on embedding cabochons around the rim. The two you see are only loosely adhered to the gourd at this time to check on the overall look. I like it.


newgourd3

And now for the bigger challenges! See the natural discoloration on the left? To my way of thinking, I’ll need to paint the gourd with acrylics rather than dye as dyeing will leave the pattern uneven since it is transparent. Also, notice the scarring at the bottom left of the gourd? It is natural therefore it is beautiful – or at least that’s how I’ve been advised to consider such imperfections.

And finally, see how the lines seem to slant downward to the left? That is an even line from the rim which was measured evenly from the top of the gourd before I removed it. Sigh.


newgourd4


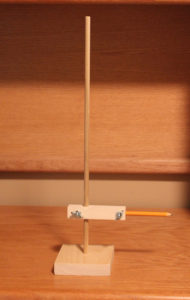
This remains one of those gourd mysteries as I have used the “pencil on the stick” (gourd compass) to measure up from the bottom on previous projects and felt the same sense of unevenness with the top cut of the gourd going one way and the lines going another.

So next time, I’ll try cutting the top of the gourd off by measuring from the bottom up with the gourd compass. I’ve tried that too with mixed results but I’m hoping it improves with experience.

Regardless of these challenges, I believe this will be one beautiful piece of gourd art once I’m done. More later!

Vicky

Finding Those Treasures to Turn into Little Bits

Finding Those Treasures to Turn into Little Bits

Last week I wrote about Little Bits of Bigger Things – turning big items into unique embellishments for your Mixed Media or Assemblage work. It’s my favorite type of hunt – finding objects that will be so much more useful if only cut up a bit or taken apart.

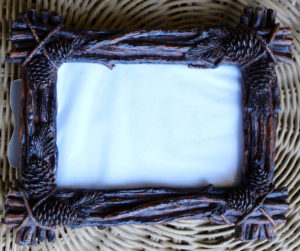
This past weekend, I discovered a new-to-me flea market/vintage marketplace (it is now on my list of favorite haunts) and brought home a number of these large items that I immediately turned into little bits. Two were necklaces – no big secret on how to dissemble those but the results may surprise you. But first, let me start with the picture frame.

frame1


A resin frame for a 4″ x 6″ picture, it drew my eye. If I used frames, it would be a possibility for our cabin. Second, it was priced for only a few dollars. But I passed it by and kept up my hunt. However, I returned to it twice before convincing myself that it would be perfect for Mixed Media Assemblage work if only it was… broken. Yep, it now sits in my Art Room in delightful pieces.


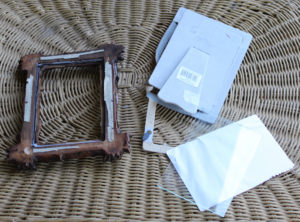
frame2


So, guess what I did first when I arrived home? Took it apart.


frame4


Then, it was time for the fun. Placing padding beneath and over the frame, I let my mallet do the work.


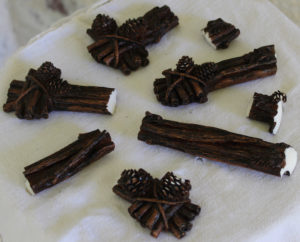
frame6


Now I have these wonderfully 3D pieces with a flat back – perfect for adhering to a canvas. I consider this a definite win as I just can’t find embellishments like this anywhere and as I slowly blend them into a number of art pieces, each will add yet another bit of uniqueness to its piece.


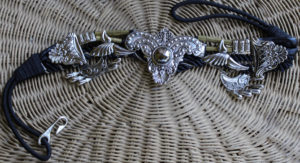
belt1


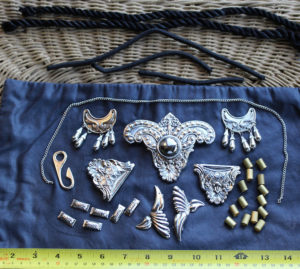
Next is the belt. A pretty belt for sure but not one I’d use in my wardrobe. Plus those pieces of silver are closer to tin and the belt was not well made. But that center silver piece? Around 4″ across – a perfect focal point for a larger work of art. And all of those other silver adornments – perfect embellishments!


belt2


It’s not a silver finish I’d use in a Mixed Media Assemblage piece, but that is easily changed. I’ll either antique the silver or paint it with Ranger’s Vintaj Patina. Just look at the yield when I finished disassembling!


necklace1


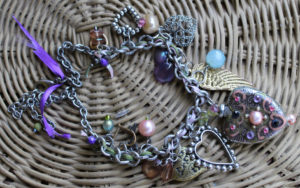
Now the necklaces – the first was sweet for sure but hung in an indiscernible mess. And the price was right.


necklace2


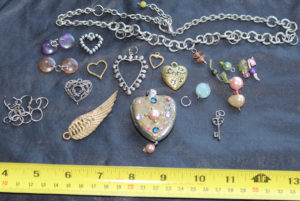
Disassembled, look at the number of embellishments. I love working with hearts so they are a welcome addition to my stash any time.


necklacefall1


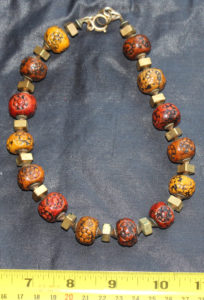
The second necklace is sort of a no brainer for disassembling but the yield looks different once in pieces.


IMG_0894


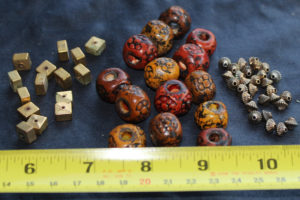
The beads are large and unusual and, most importantly, will require no painting as I work with these colors often and they are aged ever so perfectly. I don’t find beads of this nature sold individually for anywhere close to this cost. Their width is approximately .75″ and they cost me $.20 per bead. Definite score.


I encourage you to go on the hunt next time you see a flea market or vintage marketplace. Going in, know that prices in these markets vary greatly – the first market you enter may price their items three times as much as the second market a few miles down the street. I usually find the least fancy looking markets carry the best finds.

Enjoy!

Vicky

Little Bits of Bigger Things

Little Bits of Bigger Things

Version 2My art room is filled with objects to include in my Mixed Media Assemblage work. Most are found objects – little items I discover while on one of my flea market or estate sale hunts. I also use a good percentage of new objects found at hobby stores or online. But there’s another type of found object that I value even more which provides me with numerous uses – the larger item that I take apart to use bit by bit.

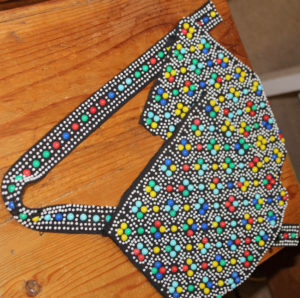
The possibilities are endless as there are so many objects that are actually more interesting once taken apart. I may move on after seeing a beaded purse at a flea market because I have no interest in paying $15.00 for a single item. But as I continue shopping, my mind may return to that purse as I think about the treasures waiting to be uncovered if only I’d buy it. Its unattractive colors are of little consequence since I can always paint a piece to coordinate with whatever color scheme I have in a particular design. As I walk over to take a second look, I realize that the purse would yield at least 50 bits of beaded design to include in my art work. That means each piece would cost me a quarter. Now, looking at it that way, the purse is quite affordable!

purse1


To the right is a perfect example. It is, in fact, that very purse. I wish I had snapped a picture of it before cutting into pieces. It had a shoulder strap (completely usable) and a sixties look to it. And to my eye – an unappealing color combination.


purse2


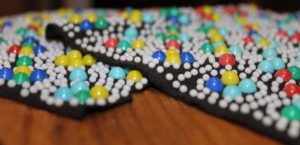
And here’s a close up of all that beaded action. Excellent for mixed media!


purse4


But look at it when used as an element in a work of art. You see the light blue and green beads highlighted with gold on the lower right? It extends up the center to close to the top. That’s the same black fabric with its red, yellow, blue, and white beads. Its look is completely transformed. Even the texture of the backing fabric adds interest.

That close up detail is taken from Tree of Hearts where you’ll find even more use of the former beaded purse.


purse3


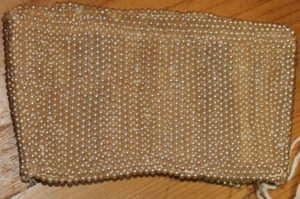
And then there is this little pearl purse with the broken zipper that I have been reducing in size little by little as I have used it over and over as an embellishment. Cost – under $5.00. Yield – beautiful enhancements to at least 20 Mixed Media Assemblage pieces.


Version 2


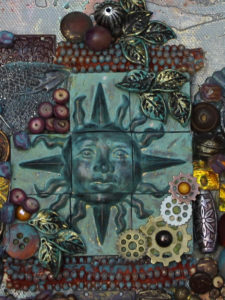
You can find bits of this little pearl purse in the image that is the header to Art Creations by Vicky. At the upper and lower edges of this closeup, do you see the orange backing topped with a turquoise pearl? Yep – one and the same. Take a look at Sun Central to see this entire piece.


doily


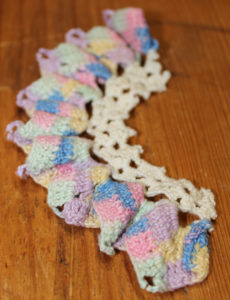
Repurposing old crocheted doilies works well too, especially if they are ruffled around the edges. In this case, the thicker the thread used to make the doily, the better the design for Mixed Media Assemblage purposes. I have been taking pieces from this ruffled doily for some time now.


doily2


Here’s a piece of that same doily ruffle in one of my earlier pieces. It’s stretched from the right of the straw basket to below it. Magnificent effect.


It’s Not Limited to Fiber or Fabric

Using bits of larger pieces is certainly not limited to fabric or fiber. What about a really old clock missing so many pieces that it is priced for a song? Steampunk is big and clock pieces thoroughly fit into that look. Bingo – your $5.00 salvage just turned into at least 10 pieces that provide distinction to your artwork.


steampunkcenterwatermark


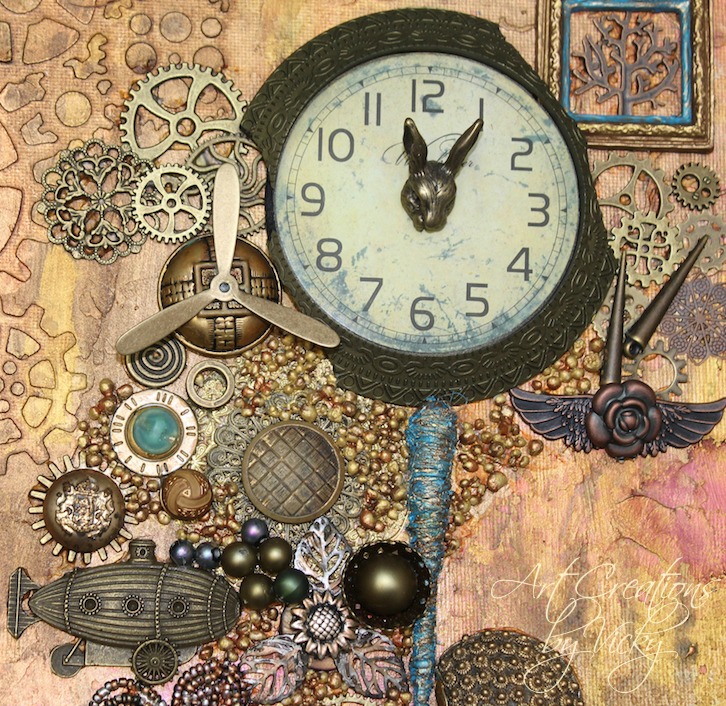
Here I used an old clock face for the focal point of a steampunk piece. You’ll notice that its frame is broken. For Mixed Media and especially steampunk? All the better! I have the gears and other pieces to use at a later time. To view the entire piece, take a look at Steampunk Time.


Remember – when hunting for a piece to disassemble or cut apart, don’t consider the colors or even the type of metal. If the metal is too shiny, you can age it. If it is silver, you can paint it bronze without risking peeling if you have the right type of product. If you don’t care for the color of the fabric/fiber, paint it first with gesso then the paint color of your choice. The possibilities are endless.

I’ll be talking later in more detail about how to change the colors or age an item. There is a lot to learn but it is well worth the time!

Vicky

Welcome to Art Creations by Vicky

Welcome to Art Creations by Vicky

wallart6
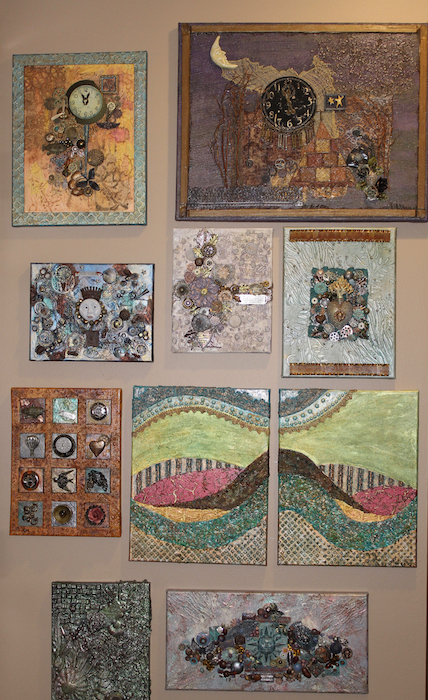
One of the walls in my art room. Every wall is filled with completed art or work in progress.

I’ve been artsy all my life but only recently started taking myself seriously as an “artist”. Although I knew I was artistic, not many around me knew the depth of my artistic side as I had marked that part of my life as private.

Art is my escape from the every day world – my treasure – an activity so throughly fulfilling that it needs no outside encouragement to keep it moving forward. However, that said, I do love touching base with fellow artists and learning from one another. I do believe we can’t create in a complete shell – that to grow as an artist, we need to see what is out there, master new techniques, and share our own work. In doing so, it  expands the scope of our own work and provides us with further inspiration.

Therefore, I’m finally doing it. I’m finally launching a site where I cannot only share my art work but teach others as well. By nature, I’m both an artist and a teacher.

What will you see here at Art Creations by Vicky? First of all, my works of art. I now create primarily in two mediums – Mixed Media Assemblage Art and Gourd Art. Eight years ago, I fell in love with Mixed Media and Assemblage art and started creating in a way that completely captured my imagination as I blended the two mediums into one. I also work with gourds, turning their hard shells into works of art by carving, burning, painting, staining, weaving, and adding adornments.

Both Mixed Media Assemblage Art and Gourd Art require a basis of knowledge. Of course, as a newbie, you can sit down and create in either medium and possibly be very happy with the result. But I have found myself more than a little lost when I attempt a new look without understanding the techniques needed to obtain that look. However, if you build slowly on your knowledge base in either medium, you can be very pleased with each step you take as your work becomes more sophisticated.

So, I’ll be sharing methods I utilize when creating my artwork. The definition of Mixed Media and Assemblage Art almost defies description as it is so vast in its inclusion – it can be expressed in so many different ways. It takes learning a few basics and then expanding from there. Where do you want to take your work next? That’s next on your list of learning. Fortunately there are thousands of YouTube videos and art blogs to provide you with step by step instructions. Find a style that speaks to you and follow those artists. Absorb the steps they teach you, personalize it, and then, turn out your own version. Respect the artist and resist the temptation to copy their creation (especially if you have any plans to sell) – it’s all about learning techniques.

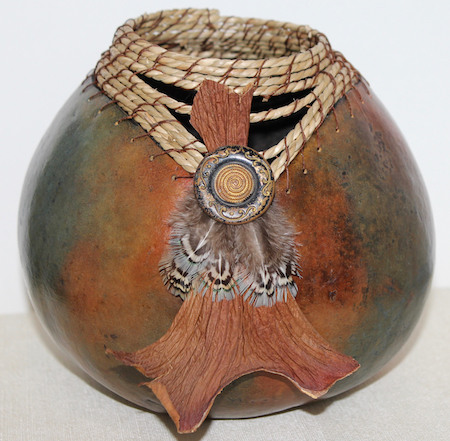
gourds4Gourd Art is the same – it takes learning the tools of the trade. Fortunately, I had a gourd artist to learn from those first days who greatly helped me establish a base of knowledge. I still rely on her expertise from time to time as she is a fantastic teacher and encourager. But, I create on my own although it is very much a work in progress. I plan on sharing some of these lessons with you as well.

My art room is a very special place to me and I love sharing ideas on efficient organization, storage, your all-important work station, and making it all visually pleasing and comfortable. So, we’ll spend time talking about where we create.

I sell my artwork at Etsy – artcreationsbyvicky. My Mixed Media Assemblage inventory is strong right now – I still have many pieces waiting to be listed. I do have a small selection of Gourd Art and that will be increasing. I have been on a Mixed Media Assemblage kick lately and haven’t been giving my Gourd Art first place. But my love of Gourd Art is as strong as ever and I’m sure it will have its turn at first place.

Finally, I sell “found objects” (little pieces of old stuff). I’m constantly on the hunt for the objects used in my Mixed Media Assemblage pieces and love exploring vintage marketplaces, flea markets, and estate sales. Each Mixed Media Assemblage piece features a number of these “found” objects and I usually have many more of these objects than I can possibly use. Therefore, I’m spreading the joy and selling some of my found objects – either individually or in a grouping (ever heard of destash?) in my Found Objects section on Etsy. It’s a way for you to acquire unique items to use in your art work without having to wade through those flea markets or similar sales yourself.

You can also find me on Facebook. I only recently started selling in my Etsy shop and I’m launching this site at the same time as my Facebook page. So, I can sorta say “We’re at the beginning.” although I’ve been working up to this point for years now!

I want to thank my sister Mary for working with me on building this website. Although I know quite a bit about running the day to day affairs of a website, I’m not the technical type who easily comprehends (or even wants to comprehend) what it takes to set up a site (I’m sorta a technophobe actually). Many thanks Mary!

If you wish to message me, please do so here. I plan to enable comments at a later date after I learn more about protecting the site from spam.

I’m looking forward to this new adventure!

Vicky